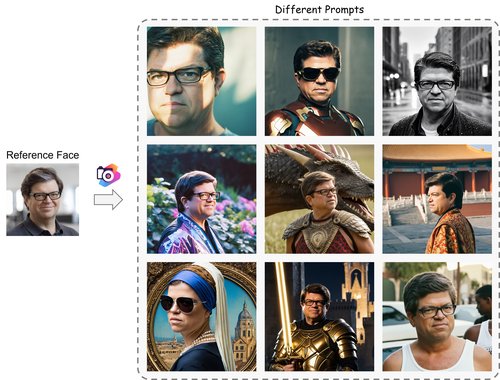
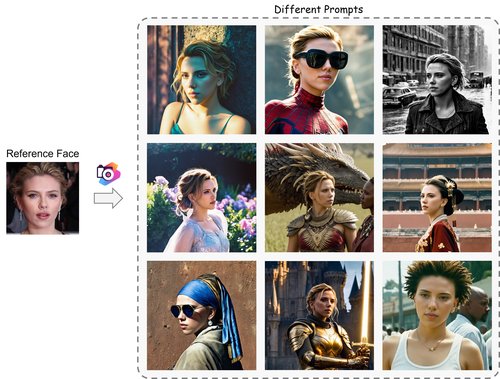
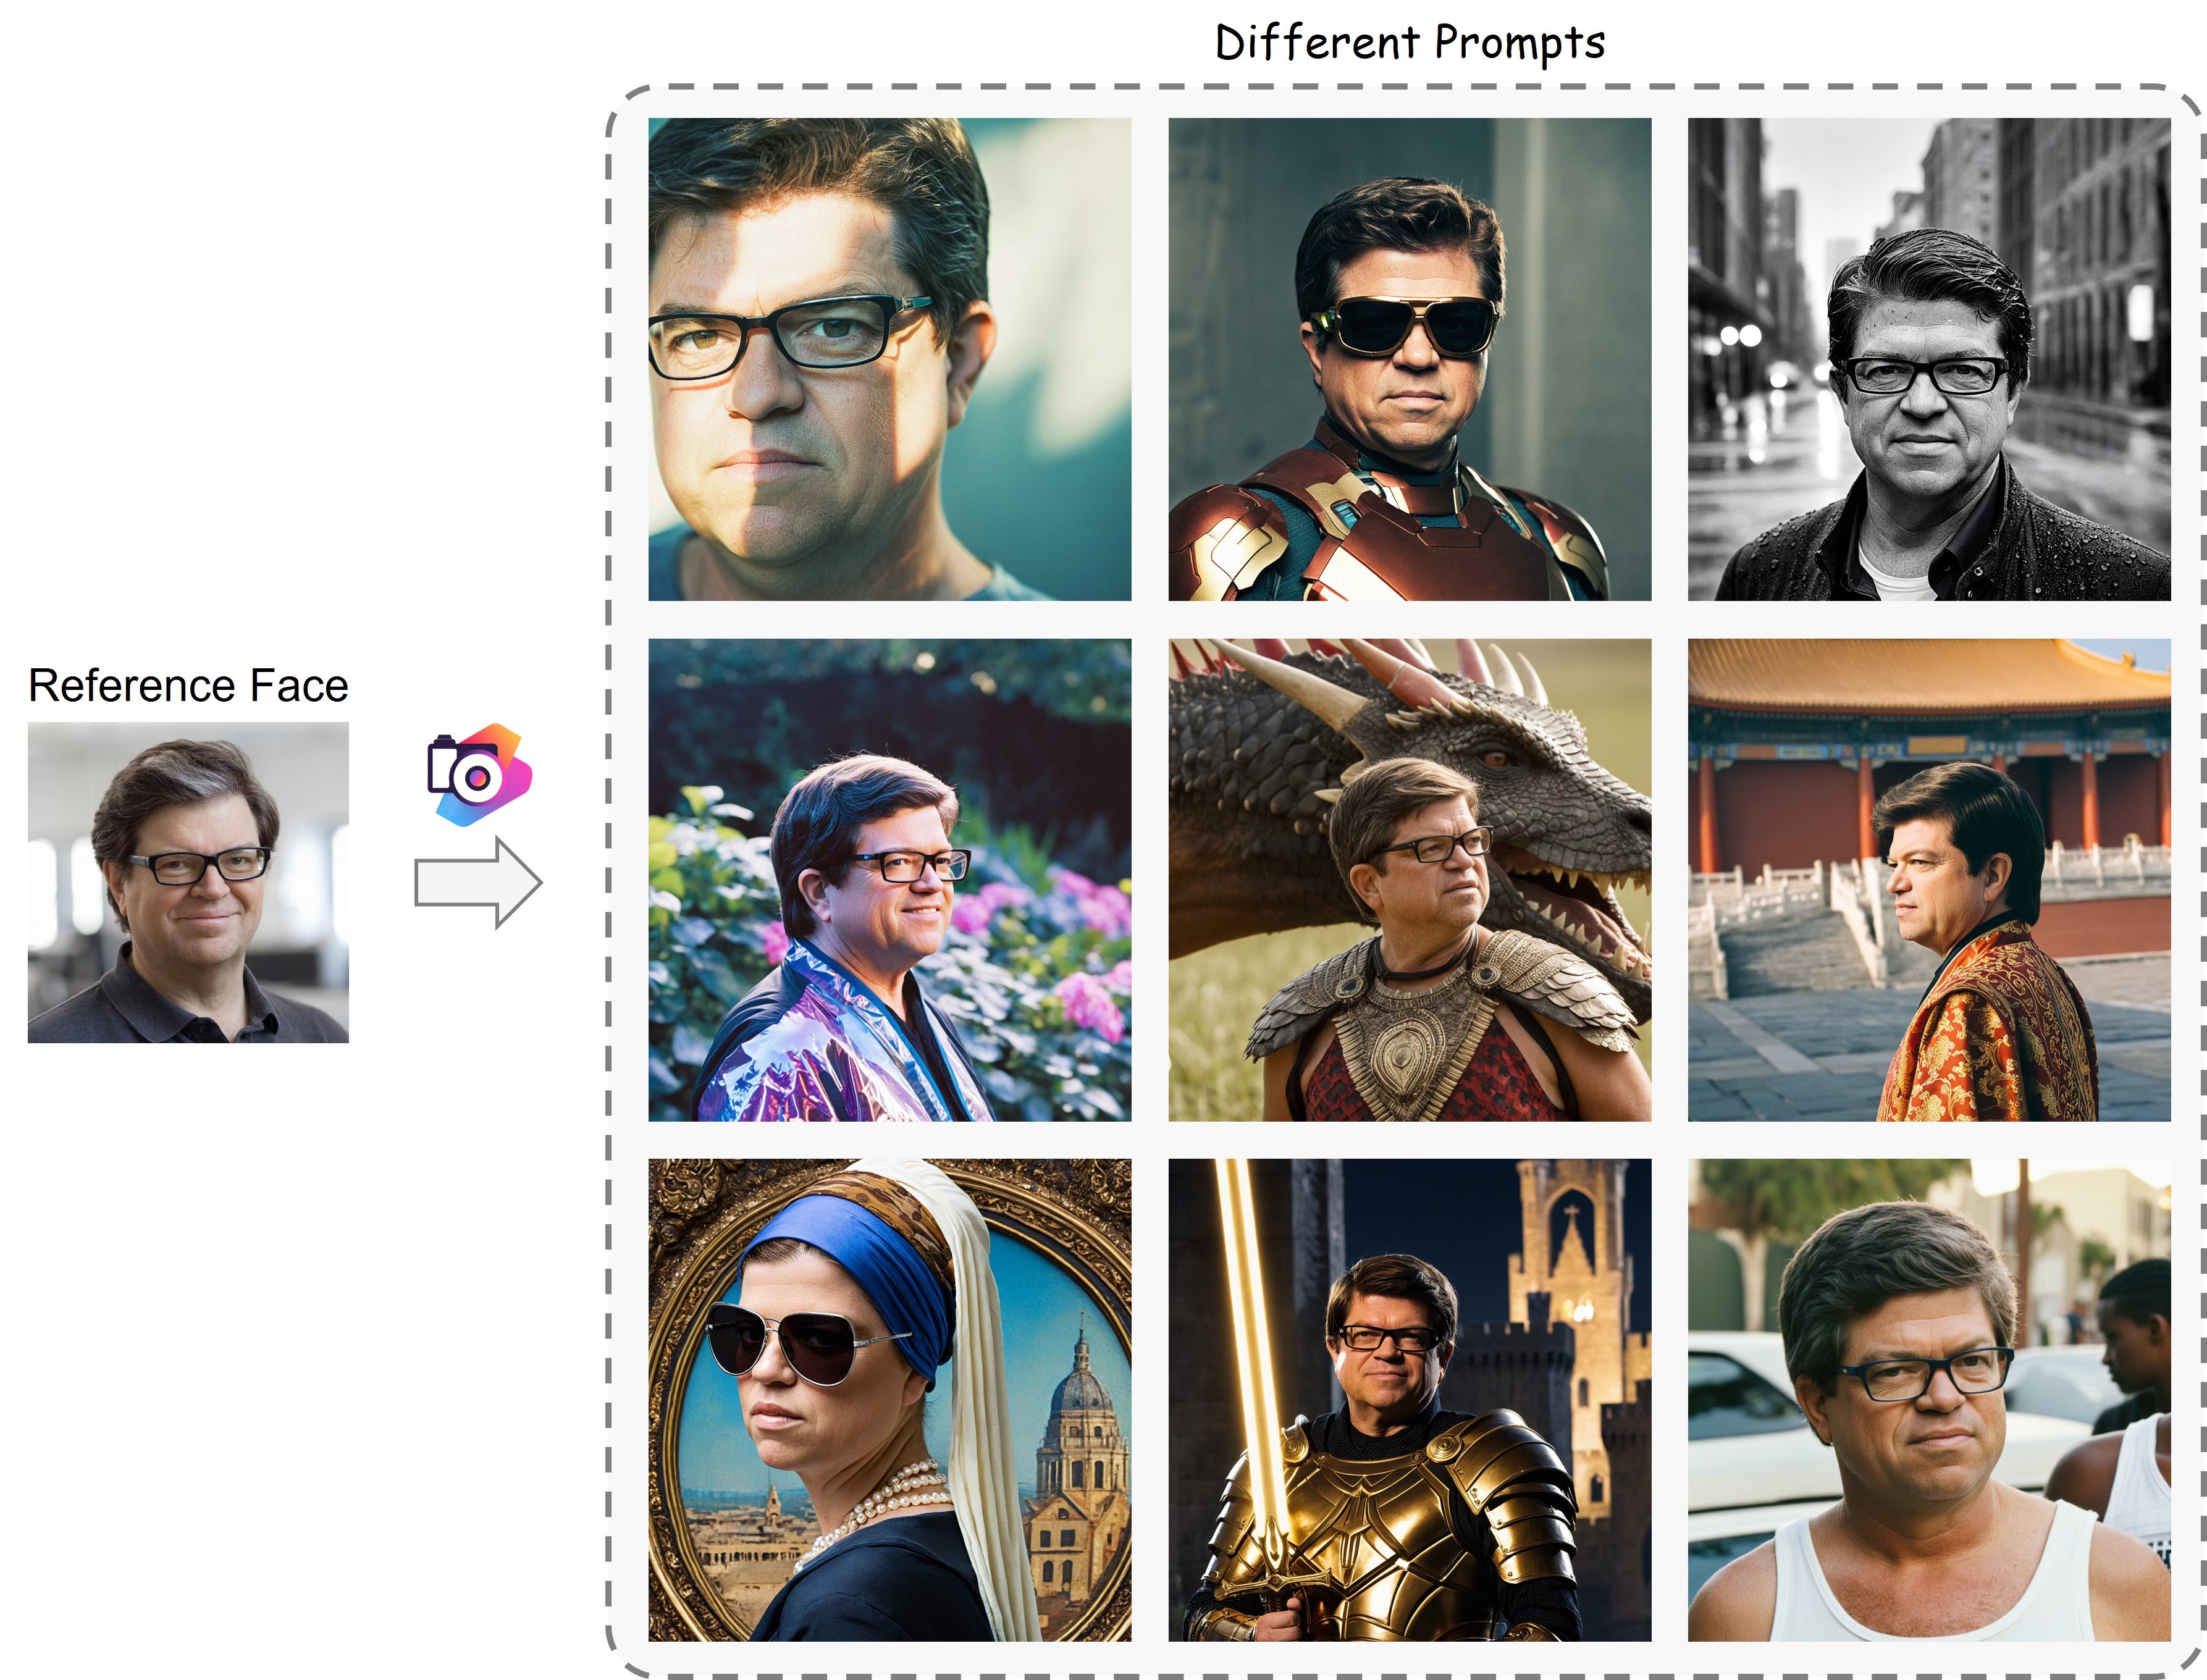
PhotoMaker:通过 Stacked ID Embedding 定制逼真的人物照片官方实现。
主要特点
- 几秒钟内快速定制,无需额外的 LoRA 培训。
- 惊人的 ID 保真度,提供多样性,保证文本可控性和高质量的生成。
- 可以作为适配器与社区中的其他基础模型以及 LoRA 模块进行协作。
示例
真实生成


风格化生成
注意:仅更改基本模型并添加 LoRA 模块以获得更好的风格化


依赖和安装
- Python >= 3.8 (推荐使用Anaconda或Miniconda )
- PyTorch >= 2.0.0
conda create --name photomaker python=3.10
conda activate photomaker
pip install -U pip

# Install requirements
pip install -r requirements.txt

# Install photomaker
pip install git+https://github.com/TencentARC/PhotoMaker.git
然后您可以运行以下命令来使用它
from photomaker import PhotoMakerStableDiffusionXLPipeline
下载模型
模型会通过以下两行自动下载:
from huggingface_hub import hf_hub_download
photomaker_path = hf_hub_download(repo_id="TencentARC/PhotoMaker", filename="photomaker-v1.bin", repo_type="model")
您也可以选择从此网址手动下载。
如何测试
像diffusers一样使用
- 依赖
import torch
import os
from diffusers.utils import load_image
from diffusers import EulerDiscreteScheduler
from photomaker import PhotoMakerStableDiffusionXLPipeline

### Load base model
pipe = PhotoMakerStableDiffusionXLPipeline.from_pretrained(
    base_model_path,  # can change to any base model based on SDXL
    torch_dtype=torch.bfloat16,
    use_safetensors=True,
    variant="fp16"
).to(device)

### Load PhotoMaker checkpoint
pipe.load_photomaker_adapter(
    os.path.dirname(photomaker_path),
    subfolder="",
    weight_name=os.path.basename(photomaker_path),
    trigger_word="img"  # define the trigger word
)

 pipe.scheduler = EulerDiscreteScheduler.from_config(pipe.scheduler.config)

### Also can cooperate with other LoRA modules
# pipe.load_lora_weights(os.path.dirname(lora_path), weight_name=lora_model_name, adapter_name="xl_more_art-full")
# pipe.set_adapters(["photomaker", "xl_more_art-full"], adapter_weights=[1.0, 0.5])

pipe.fuse_lora()- 输入 ID 图片
### define the input ID images
input_folder_name = './examples/newton_man'
image_basename_list = os.listdir(input_folder_name)
image_path_list = sorted([os.path.join(input_folder_name, basename) for basename in image_basename_list])

input_id_images = []
for image_path in image_path_list:
    input_id_images.append(load_image(image_path))
- 生成
# Note that the trigger word `img` must follow the class word for personalization
prompt = "a half-body portrait of a man img wearing the sunglasses in Iron man suit, best quality"
negative_prompt = "(asymmetry, worst quality, low quality, illustration, 3d, 2d, painting, cartoons, sketch), open mouth, grayscale"
generator = torch.Generator(device=device).manual_seed(42)
images = pipe(
    prompt=prompt,
    input_id_images=input_id_images,
    negative_prompt=negative_prompt,
    num_images_per_prompt=1,
    num_inference_steps=num_steps,
    start_merge_step=10,
    generator=generator,
).images[0]
gen_images.save('out_photomaker.png')
启动本地渐变演示
运行以下命令:
python gradio_demo/app.py
您可以在此文件中自定义此脚本。
如果你想在 MAC 上运行它,你应该按照这个说明,然后运行 app.py。
使用提示:
- 上传更多要定制的人的照片以提高 ID 保真度。如果输入是亚洲人脸,可以考虑在类词前添加“亚洲人”,例如,
Asian woman img - 风格化时,生成的脸部看起来是否过于真实?将 Style 强度调整为30-50,数字越大,ID 保真度越差,但风格化能力会更好。您还可以尝试其他具有良好风格化效果的基础模型或 LoRA。
- 减少生成图像的数量和采样步骤以获得更快的速度。但是,请记住,减少采样步骤可能会损害 ID 保真度。
相关资源
其他 PhotoMaker 的演示:
- 演示链接,在复制上运行 PhotoMaker,由@yorickvP提供。
- 演示链接(风格版本)。
Windows 版本的 PhotoMaker:
- bmaltais/PhotoMaker (@bmaltais),在 Windows 上部署 PhotoMaker。可以在此链接中找到说明。
- sdbds/PhotoMaker-for-windows(@sdbds)。
ComfyUI:
- ComfyUI的官方实现:https://github.com/comfyanonymous/ComfyUI/commit/d1533d9c0f1dde192f738ef1b745b15f49f41e02
- https://github.com/ZHO-ZHO-ZHO/ComfyUI-PhotoMaker
- https://github.com/StartHua/Comfyui-Mine-PhotoMaker
- https://github.com/shiimizu/ComfyUI-PhotoMaker
其他应用程序/Web的演示
- OpenXLab(在中国易于使用):https://openxlab.org.cn/apps/detail/camenduru/PhotoMaker(@camenduru)
- Colab: https: //github.com/camenduru/PhotoMaker-colab(@camenduru)
- Monster API:https://monsterapi.ai/playground?model =photo-maker
- Pinokio:https://pinokio.computer/item?uri =https://github.com/cocktailpeanutlabs/photomaker
Graido 演示(45 行)
由@Gradio提供
引用
如果您发现 PhotoMaker 对您的研究和应用有用,请使用此 BibTeX 进行引用:
@article{li2023photomaker,
  title={PhotoMaker: Customizing Realistic Human Photos via Stacked ID Embedding},
  author={Li, Zhen and Cao, Mingdeng and Wang, Xintao and Qi, Zhongang and Cheng, Ming-Ming and Shan, Ying},
  booktitle={arXiv preprint arxiv:2312.04461},
  year={2023}
}
来自:


